Squats for Rugby Players
For years, people have been performing the squat to get bigger, faster and stronger. It doesn’t get any more basic than squatting down and standing back up. However, when we add some weight to this equation, then add some bio-mechanical differences between individuals, the oh so simple squat has the potential to become an extremely complex puzzle to solve. Technique is also very important to make sure you are performing the exercise effectively.
Rugby players can get a wealth of benefits from regularly performing squat variations in their training program. Stronger legs will help transfer power more efficiently leading to greater speed, change of direction and drive in mauls, scrums and clearing out at the ruck. It really should be the bread and butter of any rugby players regime.
The article will break the squat down to its base level in order to demonstrate how to execute the squat safely and successfully, allowing you to utilize it to your advantage and reap the benefits.
The Simple Squat
First and foremost, we need to understand that a squat is a fundamental movement pattern. Yes, it is seen as an exercise but is also a specific series of motions that can be varied to improve numerous aspects of physical performance. Simple changes, by adding weights (various forms of equipment can be used) or by altering your stance, can increase the difficulty of a squat. Contrastingly, there are also ways that we can regress the squat to make it easier, if a person struggles with a body weight squat or is in need of rehabilitation post injury. lots of strong guys and girls can squat with a heavy weight but struggle with a simple bodyweight squat.
Since the majority of athletes (including rugby players) will possess the necessary strength to perform a bodyweight squat, we will continue under this assumption and detail the progressions of this lift.

The basic body weight squat looks nice and simple, which it is, pending you understand the technique required. You see, some people possess a lot of strength (rugby players certainly do) however, they can sometimes struggle with basic movement patterns like the squat because they lack the control and or mobility to perform such movements without falling over. I know a lot of big strong guys and girls that can squat with a heavy weight but struggle with performing a simple body weight squat.
The problem lies within the control of a movement and simply being able to balance and control their own body mass. Thus, when they put a load on their back, it sometimes helps control the movement by providing a load that helps keep the athletes centre of mass where it should be assisting them in the exercise so it actually makes the lift easier rather than harder.
Despite this, as a coach I always ensure that my athletes possess the necessary strength, control and mobility to perform a bodyweight squat. This makes this exercise a fantastic assessment tool to analyse and expose certain strengths and or weaknesses in an athlete. There are so many things that can be picked up during a simple squat but, from experience, I know that it takes a very keen eye to spot certain issues. To the average person it may look like a squat, but to the trained eye there might be numerous areas of tightness, lack of strength and neural control that may need addressed.
Squat Form/Technique:
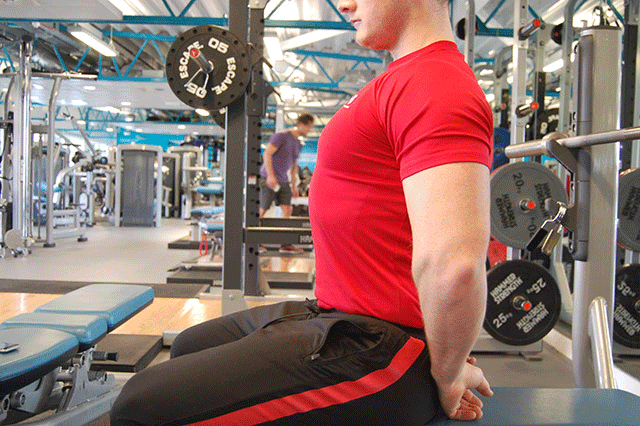
Top Position: Standing in an upright position with your feet shoulder width apart pointing forwards or slightly outwards. The spine in neutral position and the shoulder blades backwards and downwards.
Descent: By taking a deep breath into the abdomen this allows you to utilize the abdominal muscles to provide stability to the spinal column. Due to the fact your mass will shift backwards you may need to extend the arms out in front to balance. Ensure the knees are pushed outwards in order to track the foot. Descend down until you feel your pelvis about to turn under then pause.
Ascent: Maintaining the held breath, push back to the top through the middle of the foot keeping full control and brace of the abdominals and squeezing the glutes to return back to the top position.
Give it a try. If you can hold a bodyweight squat with good posture for around 30 seconds you’re doing well. Remember to start slow and take your time.
Squat Variations
There are many variations of the basic squat that target different areas of your body and can improve your physical performance. The following are not all of the options, but definitely the most popular, and most useful in respect to rugby related strength and performance.
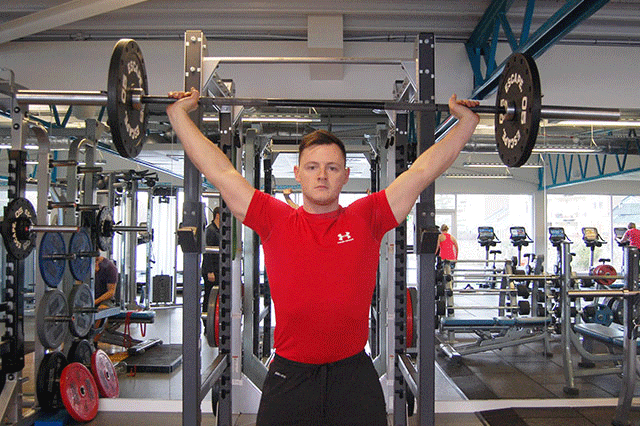
The Back Squat (High Bar and Low Bar) – The back squat refers to the bar being placed on your back. The high/low bar refers to where the bar sits on your back. High is up on top of the trapezius muscle allowing you to squat with a more upright posture (mobility dependant) whilst the low bar is situated further down meaning the lifter will likely lean further forward using the hips and back more to lift (common in power lifting).
The Front Squat – The bar is taken in front of the body on top of the deltoids and tucked in beside the neck. The grip can be with the under the bar or alternatively crossed over on top of the bar. The former grip is necessary if performing other lifts such as the clean.
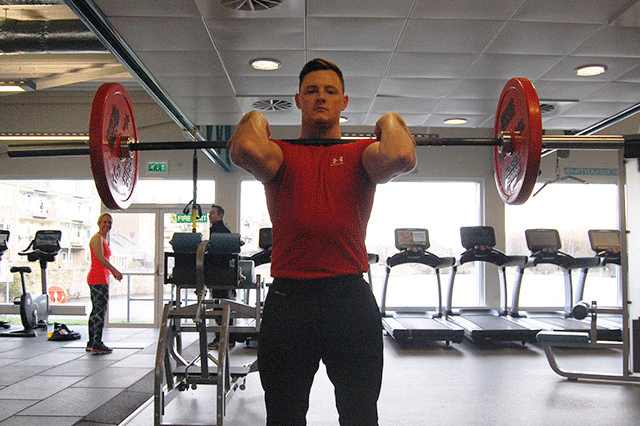
Overhead Squat – Is performed by pushing the bar overhead with a wider grip then squatting down. This is, by far, the most advanced variation of the squat.
Now remember, these are all performed with a barbell but the squat can easily be performed with any piece of equipment including dumbbells, kettle bells, machines, sandbags, medicine balls or even a log.
Hand Position
It is very important to make sure your hands are in the right position, before you even pick up the bar. If this is incorrect, you can risk the chance of injury. You want your hands to be relatively close on the bar, but not so close that they get caught under the bar and your shoulders. If your hands are too wide you will not be able to contract the upper back muscles leading you to fall forward during the lift putting unnecessary stress on the lower back. Ensure you take a full grip of the bar with your thumb wrapped around the bar to have full control. There are generally 3 grips: Narrow full grip, wider grip (no thumb) and wide grip (no thumb).
I would suggest using the first grip when possible, however, lifters’ mobility might prevent such grip. Other variations, such as a low bar squat, may require the use of a wider grip to perform safely. In any case, I would always tend to recommend using a full grip.
Bar Position
As discussed previously, there are different bar positions however, for a standard high bar position, you want the bar to be situated along the meaty part of your shoulders resting upon the trapezius muscles. By pulling your shoulder blades backwards, not only do you promote rigidity to the upper back reinforcing the lift but you end up with a nice cushion for the bar to sit on instead of pressing against the spine. The image below demonstrates the difference between the high bar squat and low bar squat. From this, observe the different muscles that are activated during each variation. They are both acceptable ways to lift, so don’t be scared to experiment and find your preference.


Foot Placement
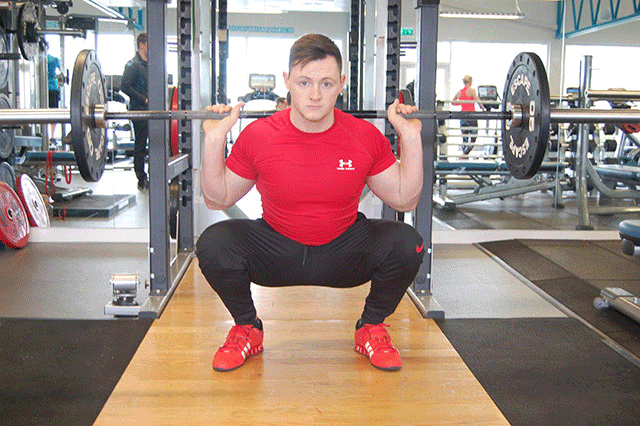
Foot placement, while important technically, is based more so on individual preference and ability. In the terms of a simple high bar back squat, if someone has great ankle, knee and hip mobility they may be able to perform the squat with the feet pointing straight ahead, however commonly lifters may need to turn the feet around 15-30 degrees outwards in order to allow appropriate placement of the knees which should be pushed outwards.
Hips
Without getting too complex, by pushing the knees outwards, you allow for the femur (thigh bone) to move free from being impinged from the front of the hip socket allowing you to get deeper in the squat without the pelvis rounding under.
This rounding of the hips is called posterior pelvic tilt (or commonly known as butt wink). This is caused when the femur comes into contact with the front of the hip capsule leaving the body with no option but to turn the pelvis under. This leads to potential lumber flexion (back rounding) and unnecessary stress on the lower back. This can be easily avoided by pushing the knees out hard. Additionally, there may be issues with tightness in certain muscles leading to posterior pelvic tilt such as the calves and hamstrings among others. T
his is a complex issue that is different for everyone so working with a coach that can help address your individual differences. A common fault that can occur when people attempt a squat is when their knees fall in, also known as valgus collapse.
It is commonly associated with a weakness in the glutes (see picture). This can be easily addressed by strengthening the glutes and pushing the knees out.
![]()
Breathing and Bracing
Like many exercises, breathing is paramount, but often overlooked. With squats, this is no different. I cannot stress quite enough just how important the ability to breathe appropriately in the squat is. First of all, we need to breathe into the right place which, in this case, is the abdominals. We commonly breathe into the chest cavity however, when we want to promote an appropriate brace for the spine, we must breathe into the abdominals (also called diaphragmatic breathing) and hold that breath throughout the squat which ensures the abdominal muscles are forced to act as a pillar of strength for the vulnerable spinal column. This allows the lifter to remain in an upright posture with much less stress on the back.
This is where people tend to go wrong when squatting heavier loads as they rarely possess the correct control of the abdominals forcing them to fall forward. This can be very risky and cause back injuries quite easily. Trust me when I say this, practicing breathing and bracing techniques with no load can work wonders for increasing your strength in any lift.
How Deep?
How deep should you squat tends to be a highly debated topic within the fitness industry, and unfortunately, there isn’t a guaranteed answer. Each individual is different and it can depend on numerous variables that a coach needs to analyse and assess before making a conclusive decision. Some people believe that squatting deeper than 90 degrees will explode your kneecaps, while others believe that if it isn’t deep, it doesn’t count. Remember that with fitness, it is something that can be built upon, so starting higher and pushing deeper as you gain strength is probably the best bet, but this will again, depend on your fitness level. The truth is you need to figure out what your body is capable of doing. Without going into too much science heavy literature there are a few main things that dictate how deep you can/should squat.
1. Bio-mechanics – Analysis of the hip anatomy shows the vast degree of contrasting joints which leads to different squatting capabilities. People with deeper hip sockets may struggle to squat deep without rounding over no matter how flexible and strong they are. No amount of soft tissue work and stretching will ever overcome bone restrictions. Whilst those with shallow hip sockets will likely find squatting deep very easy with little to no restriction.
2. Mobility – Moving further from the previous point, those that do have the capability to squat deep (good bio-mechanics) may be faced with tight muscles and connective tissue. This is where a good physical therapist can come in handy to break up the adhesions and allow for fluent movement to occur. Alternatively, familiarise yourself with a foam roller, like Blackroll do not use bad bio-mechanics as an excuse to be lazy with your soft tissue work either. If you want to see results, you must put the work in.
3. Strength – Some people just naturally lack strength in the bottom position. I would therefore recommend that you get used to YOUR bottom position wherever it may be and practice squatting with appropriate loads and build up slowly.
4. Control – In order to be able to squat competently you must practice a lot. Be aware that practice does not make perfect, perfect practice makes perfect. Learning how to squat correctly and practicing regularly will be the key to success.
Programming
Programming in itself is an extremely complex topic that has hundreds of books solely dedicated to it. To effectively program the squat to a specific goal would depend on a number of variables. The following is a small list of things I would suggest from a general programming point of view.
1. Perform the squat first in the session – This will allow you to give 100% effort before other exercises have the opportunity to tire you out.
2. Don’t perform heavy dead-lifts on the same day – I would suggest that to get as much from each lift as possible without them competing for effort. To do this, program squats at least 48-72 hours apart from dead-lifts.
3. Warm up specifically – Choose exercises to warm-up and mobilise the appropriate musculature in order to squat safely and effectively. Just walking into the gym and squatting with a heavy bar on your back is a one-way ticket to an injury.
4. Use Variation – Pick a few different types of squats to place throughout your training week. Not all of them need to be heavy and demanding but some can be used to improve power (jump squats) or even mobility/control (light overhead squats). Put them on separate days so they do not compete with each other.
5. De-load appropriately – Do not just go as heavy as possible all the time. Stressing your body out time and time again will surely lead to injury, so ensure you program in weeks where you decrease the intensity to allow for adequate recovery.
6. Have a goal – if you want to focus on adding muscle – add muscle. If you want to focus on getting stronger – squat to get stronger. Stop trying to build muscle, strip fat, and get really strong all at the same time. You’ll spend a lot of time and effort spinning your wheels but getting nowhere.
Lifting Aids
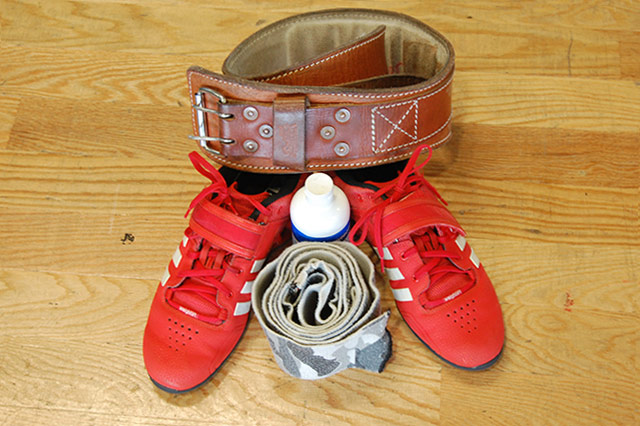
Belt – As discussed in the last dead-lift article, a lifting belt can offer the benefit of a more prominent abdominal brace which may assist a lifter perform safer squats. However, I would only advise using a belt at heavier loads at perhaps 80% of your 1 rep max and above.
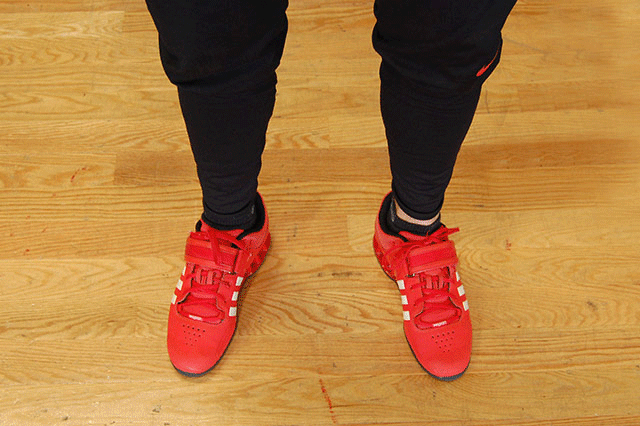
Lifting shoes – Lifting shoes not only provide stability in the squat by promoting a solid platform to lift from versus lifting in soft trainers, but the small heel lift may assist the lifter to squat slightly deeper by alleviating some tension on the ankle. It may seem a small thing but they begin to add up when the going gets tough.
Knee wraps/sleeves – The use of knee wraps or sleeves can assist the lifter to gain some elasticity to the bottom portion in a squat potentially making it easier to get back up. Similarly to the belt, I would not rely on these aids all the time and be selective when you choose to use them with heavier loads.
Wrapping Up
The purpose of this article was to strip the squat down to its bare necessities and demonstrate how you can use this amazing lift as part of your training to be a better rugby player.
Many of the topics covered could be expanded in articles of their own, which I encourage you to read into more if you find something of particular interest. I do hope that you will be able to use this as a guide of which you can start out with a safe and effective squat that you can improve and build upon.
Get Great Training Gear at rugbystore.co.uk
Stay tuned for more articles from the author.
Dean Robertson MSc, BSc (Hons) owns an Edinburgh based personal training company called Elysium Personal Training. He trains a wide selection of clientele ranging from elite and novice athletes to the novice gym goer looking to improve their overall health and well-being.
You can contact him at elysiumpt@outlook.com or find him on Facebook @ Elysium Personal Training
Comments